


The Full Snatch-Squat Lift – Straight Bar
Whether you perform this lift in Olympic lifting, Speed-Strength training, body building (not as typical), or Cross-fit use caution. In the cross-fit arena, this lift if named the ‘overhead squat.’ This lift is the most difficult lift in all training regimens. Done incorrectly, it can cause severe injury: first to the lower back and secondly to the shoulders. This lift requires better technique than any other lift thus, work up your intensity only after you have mastered technique; the heavier the load you use, the greater your technique must be. If you are involved in Cross-fit and perform this lift instead of the snatch (see description), ensure that your instructor really knows what he or she is doing because there are not really that many qualified coaches that can teach this lift.
Phase 1:
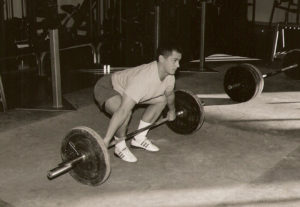
Phase one of the snatch begins from the UAP (universal athletic position) by pulling the bar off the floor while maintaining a strong, proper posture (do not round the back). Keep the bar as close to the body as possible. This is commonly referred to as the first pull. The first pull ends about the middle of the thigh.
Phase 2:
Phase two is referred to as the second pull. This phase is the shortest and most explosive motion of the entire snatch movement. The second pull starts at mid-thigh and ends at the middle of the hip. At this point, the arms are still straight, the body is almost completely extended and the heels should come off the floor while simultaneously shrugging with the shoulders.
Phase 3:
Phase three is called the high pull. The high pull starts at the middle of the hip and ends at the lower portion of the chest. At this point, the body is completely vertical and fully extended. The arms are bent with the elbows pointing upward. The toes should be the only part of the body still in contact with the floor. The bar should still be as close as possible to the body (the further away it is, the heavier the weight will seem.
Phase 4:
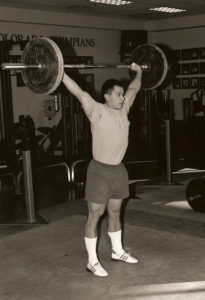
This is the “rack” phase, which has two positions. Depending upon the lifter (beginner or advanced), you have two options. However, both positions should be practiced to ensure efficiency. If you are “power” snatching, there will be very little knee bend. If you are doing a “full snatch,” a full squat will be required to properly execute this lift. Whichever lift is being performed the rack position should start at the chest and end overhead (the front bar should line up with the back of the head). In this position (from phase three to phase four), the feet should leave the floor for a brief second and should make an audible “pop” when returning to the floor. If there is no distinct sound, either the motion is too slow or it is primarily the upper body that is doing the work and not the full body as is desired. The timing should be such that your arms should lock the bar out as the feet (heels) hit the floor. This would be termed a “marriage of gravity” in either lifting or the martial arts.
Phase 5:
This is the recovery phase and should be the easiest part of the lift, but it is also the most important. Successful performance of this phase indicates the lift was done correctly. Depending on which lift was performed, the power snatch or full snatch, stand up with the arms locked out fully above the head, weight in hand (feet should be back to original starting position). Hold the weight for two long seconds and lower the weight to the floor. If you are using bumper weights, you can simply drop them from the raised position and control them once they hit the floor. Captions are above picture.
The UAP (universal athletic position)
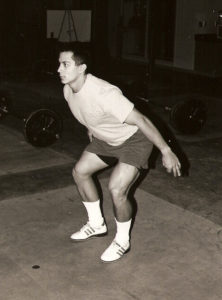
Snatch Lift (first pull – starting position)
Snatch Lift (starting second pull)
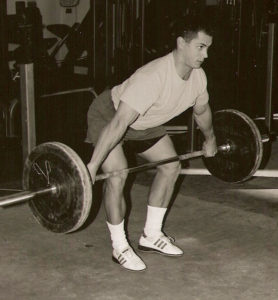
Snatch Lift: Ending second pull, transition into high pull.
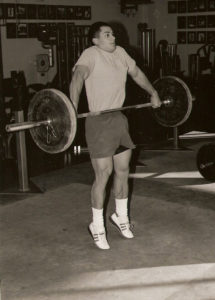
Snatch Lift: the “high pull.”
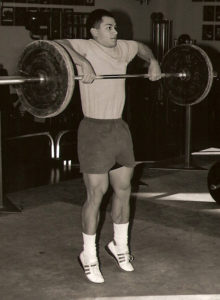
Snatch Lift: the rack position with little knee bend.

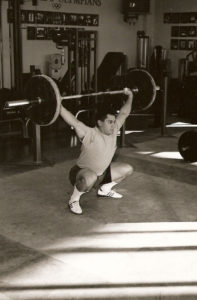
Snatch Lift: the rack position from a full squat position.
Snatch Lift: recovery position