


Have you ever done those endless sessions of sit up that just do not seem to do anything toward strengthening your core? You’re not alone and they may be doing you more harm than good. Having a six pack of abs is not a good indication of core strength. Why? Because it’s not the muscle you see that are key, it is the ones you don’t.
One group of these muscles is the Transverse Abdominis (TrA) muscle. By engaging this area before performing exercises and during exercises, you’ll have a healthier spine and lower back; not only now but in the future. It will help your six-pack abs, but let’s focus on the core, which is more important. For pro athletes, we call this the money maker because the core must be in tip-top shape to be really good at your sport.
The TrA acts to protect your spine and is just beneath the “six-pack abs” or in technical terms, the rectus abdominis, which is why the TrA is often overlooked. But, in terms of the core, the TrA has a much greater role in your core than other ab muscles.
There is a reason the TrA is overlooked; that’s because a great many people have a tough time properly engaging this muscle. How can we engage the TrA? Follow the steps below:
• Lie flat on the floor.
• Contract your stomach so that your belly button moves toward your spine. If you place a small object on your belly button (small saucer, bottle lid, etc.), you can easily observe the downward motion.
• Do not hold your breath during the motion. Breathe normally. Actually, you should be able to carry on a conversation.
• Contract your ab (TrA) muscles for 5 seconds and then, let go. Perform 15-25 reps. It’s a great warm down after a workout.
Work on the Core – Not the Six Pack
Many believe that building that six pack builds the core. It does, but not as much as you think and a great many complain of lower back pain due to lots of crunches and sit ups and as they age. There is a reason for this. When you perform core-training exercises that force your trunk and spine into what is termed excessive flexion (crunches and sit ups are examples), the facet joints and vertebral discs within your vertebral column really take a beating. This same thing happens when excessive extension. After all, these muscles are not like biceps muscles that prefer to be in the shortened position versus an elongated position.
What’s the Purpose of Your Core?
Briefly, the core muscles provide stability. All the muscles in your core and lumbopelvic hip complex work in tandem to provide protection for your spine, especially at the lumbar segments in your vertebral column. Most notably, these areas protect your spine during movements in the form of: anti-rotation, anti-flexion and anti-extension.
It is not about avoiding moving into rotation, flexion and extension during daily activity. It’s about how we should think about our core this way to get a better understanding of what’s truly happening with your spine. So, how do we determine what’s right for us in terms of core strength, routines, etc?
To begin, you need to adjust your spine and find a posture that feels best for your own body. Next, your primary goal should be to achieve proper core stability. If you can stabilize the muscles in your core in the presence of movement, you’ll achieve a greater level of health and a happier lower back that will likely be pain free. It’s not about popping pills to cure that lower back pain, but generally about strengthening your core muscles.
Once you find your proper form, you can begin to emphasize strengthening your core. This is easily done by adding external resistance from the use of resistance bands, medicine balls, dumbbells, cable column, etc. As you develop a good foundation and especially if you’re an athlete, you can begin to add power and explosive movement patterns into your core training routines. A core training progression would follow a step-wise process:
1. Spine Organizations
2. Proper Posture
3. Core Stability
4. Core Strength
5. Power Development
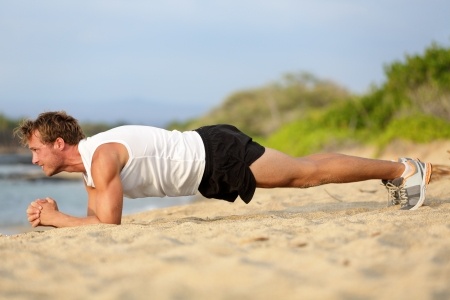
This progression listed above is important; it will help you develop a great core and strengthen your spinal area for long-term health. Let’s try the basic Plank Hold. During this exercise, your goal is to brace your core muscles, create full-body tension and to hold a static position, while gravity and your body-weight try pull at you.
Moving on to a higher level, you can perform an anti-extension exercise. In this type exercise, you are deliberately attempting to avoid spinal extension, especially in the lumbar spine, i.e., you do not want to let your hips dip down toward the floor. To properly perform all of this at the same time, it’s necessary for you to have core stability. This is the real key – core stability is necessary prior to adding elements of strength and power. You need to master exercises at each level prior to moving to the next step in your training progression.
Basic/Beginning Level Core Training Exercises
Dead-Bug
1. Begin lying on your back with your hands extended above you toward the ceiling.
2. Bring your feet, knees, and hips up to 90 degrees.
3. Exhale hard to bring your ribcage down and flatten your back onto the floor, rotating your pelvis up and squeezing your glutes. Hold this position throughout the movement. This will be your starting position.
4. Initiate the exercise by extending one leg, straightening the knee and hip to bring the leg just above the ground.
5. Maintain the position of your lumbar and pelvis as you perform the movement, as your back is going to want to arch.
6. Stay tight and return the working leg to the starting position.
7. Repeat on the opposite side, alternating until the set is complete.
Mountain Climber
1. Begin in a pushup position, with your weight supported by your hands and toes. Flexing the knee and hip, bring one leg until the knee is approximately under the hip. This will be your starting position. Do not let the hips dance as you perform the exercise.
2. Explosively reverse the positions of your legs, extending the bent leg until the leg is straight and supported by the toe, and bringing the other foot up with the hip and knee flexed. Repeat in an alternating fashion for 20-30 seconds.
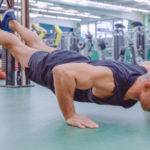
Plank Hold
1. Get into a prone position on the floor, supporting your weight on your toes and your forearms. Your arms are bent and directly below the shoulder.
2. Keep your body straight at all times, and hold this position as long as possible. To increase difficulty, an arm or leg can be raised.
Advertisement: Rolex (click on photo for more info)

Intermediate Level Core Training Exercises
Once you’ve mastered the basic level section, check out this list of the four core strengthening exercises with a corresponding video demonstration of each one:
Anti-Rotation “Pallof” Press and Overhead Raise
Assume a tall kneeling position; this will force you to engage your glutes to remain tall.
1. Position yourself perpendicular to a cable column (or where you are using a band) and move a couple feet away to allow for tension on the cable. The cable should be aligned with your mid-section. With your stomach tight, chest tall, and shoulders back, slowly control the cable away from your body staying in-line with your sternum until your elbows are almost locked out. Pause for 2-3 seconds and return to start.
2. Return to start and repeat for 10-12 repetitions. Make sure you focus on remaining tight throughout your core and controlling all motion.
3. I find people often use too much weight on this exercise, which promotes unwanted movement. Keep the weight moderate and focus on breathing and staying tight through your core.
Half-Kneeling Chop
1. Clip a rope attachment to the highest level of an adjustable cable machine. Kneel on the floor, with your leg closest to the weights bent to 90 degrees, foot flat on the floor. Extend your arms and grab the rope with an overhand grip, hands shoulder-width apart.
2. Brace your core, squeeze your glutes, and use your torso to pull the rope down and across your body, past your opposite hip. Return to the starting position and repeat before switching to the other side.
3. Avoid rotating your torso during the movement; maintain a slight bend in the elbows; and, maintain a tall and straight spine throughout the exercise.
Perfect Posture Rotating Plank
1. Place your elbows and feet shoulder width apart on the floor, with your legs and body straight in plank position.
2. Rotate your hips, shoulders, and feet while raising your right arm so that you shift onto your left elbow. As you rotate, straighten your right arm up towards the ceiling. Rotate your body and arm back into the starting plank position.
3. Repeat the rotating motion on the right side.
Plank Body-Saw with Valslides
1. Assume a forearm plank position by lying on your stomach with your elbows under your shoulders and a Valslide under each foot.
2. Raise your body so that only your forearms and the Valslides are in contact with the floor.
3. Keep your midsection tight, squeeze your glutes, and slowly push your body away from your forearms.
4. Only slide back as far as you feel comfortable, without piking or allowing your low back to sag. When you can’t go any farther, pull your body back up toward your forearms past the starting position.
5. Repeat for the desired number of repetitions, always keeping your hips elevated in a plank position.
Advanced Level Core Training Exercises
Finally, you’re ready to tackle the advanced section. Here is the list of the three core strengthening exercises with a corresponding video demonstration of each movement:
Side Plank Hold to Row with Hip Flexion
1. Position yourself next to a low-pulley cable machine and get into a side plank position on your forearm, facing the cable. Grab the handle with your free hand and palm facing the floor. Arm should be fully extended.
2. Brace core and drive the elbow past your back, while simultaneously pulling handle to your side. As you do so, pull same-side knee toward chest (to a 90 degree angle or greater). Pause and contract the muscle around your shoulder blade, while holding knee position. Slowly return hand and knee back to starting position.
Advertisement: Louis Vuitton (click on photo for more info)

Half-Kneeling Medicine Ball Wall Toss
1. This core exercise isolates your core more and does not allow you to use your legs as much. It is a great exercise for working on power and core stability. Be explosive and quick for a few reps and then switch sides.
2. To do the Half-Kneeling Rotational Throw, set up with one side to the wall and place the foot of the leg closest to the wall flat on the ground. You should be in a half-kneeling position with your front leg up. You may need to open your front knee up slightly toward the wall. Holding the ball in both hands, bring it toward your outside hip.
3. Then, throwing it underhanded, rotate and throw it into the wall. Throw it as hard as you can, rotating toward the wall as you throw. Follow through with your arms.
4. Catch the ball and reload, bringing the ball back outside your hip.
5. Make sure to engage your glutes as you throw to keep you balanced. Also, do not round forward. Keep your back flat and abs engaged as you throw.
6. Complete all reps to one side then switch to half kneeling on the other side.
Farmer’s Carry Variation: Bottoms-Up Kettlebell Waiter’s Hold with Dumbbell Suitcase Hold
1. The bottoms up carry is incredibly challenging for your grip and shoulder girdle. The position of the kettlebell demands a tight grip, stable shoulder, and midsection. You cannot keep the bell balanced in this position without a well braced midsection and strong scapular control.
2. Start by swinging the bell with a tight grip so you balance it with the bottom pointed up. You can use your other hand to stabilize the kettlebell at the top before you start walking. However, to make it extra advanced, carry another kettlebell in your opposite hand.
3. Make sure that are keeping your abs tight and your shoulder blade packed by squeezing down through your armpit and lats. Continue to crush the grip of the kettlebell and walk smoothly. You can make this exercise more difficult by extending the kettlebell forward while keeping your upper back tight. Walk for distance or time for each rep.
So, get out there and train that core. Train for function first, not anatomy. You will find it easier to achieve optimal performance in this manner and you will prevent injury.